You can download the Cristie VA from our website.
The link is: https://source.cristie.com/download/CristieVA/protect.ova for deploying to VMware environments.
You can also deploy to KVM based environments by deploying https://source.cristie.com/download/CristieVA/protect.ova, or to Hyper-V by deploying https://source.cristie.com/download/CristieVA/protect.vhd.
If you do not know how to deploy VM images (or do not have permissions to do so) please contact your system administrator.
For example, within the vSphere Web Client, select Actions > Deploy OVF Template… and then follow the onscreen instructions, navigating to the OVA you have downloaded from our Portal site or public repository.
- Note: During deployment older versions of the Web Client may issue a warning that the OVA is self-signed. This is normal and can be safely ignored.
Once deployed, power on the VM.
In the console you will then see a welcome message. If you configured the root password during the OVF deployment you can login with the password you provided, otherwise follow the on-screen prompts:
-
You will see the login is root and the password will also be shown to you - enter the password shown on screen and then you will be prompted to change the password to something that is known to you. This helps secure the VM and ensure the password set is only known to you and those who you choose to share it with.
-
Optionally, you may then generate SSL certificates in order to access the GUI over HTTPS. The initial configuration script will explain how this is performed.
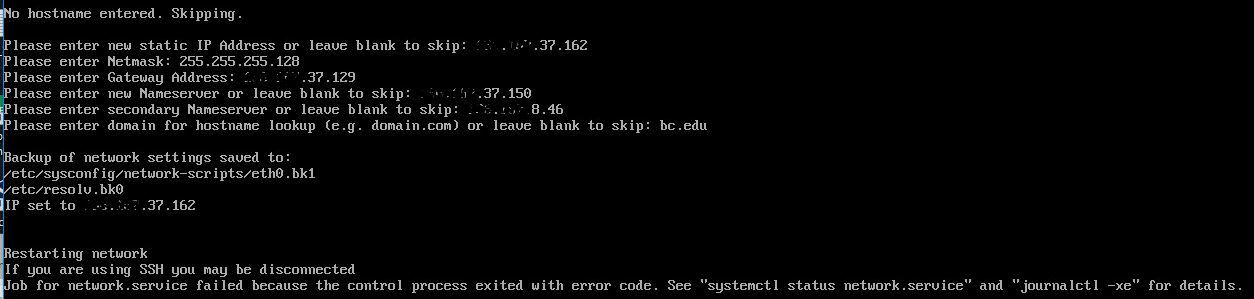
If you did not enter the network configuration during the deployment wizard, you may configure the network now using the config_network command.
The process to complete installation will then complete. You should then be able to access your Cristie VA by entering the IP address you assigned to it during installation, from any connected browser.